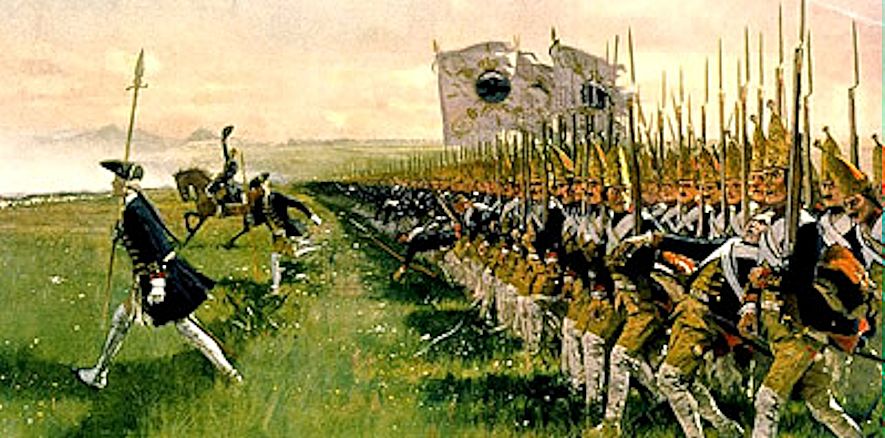
Years ago in England, men such as H. G. Wells and Don Featherstone wrote rules for fast-moving, fun wargames with toy soldiers (military miniatures). They were eventually eclipsed by players who wanted more sophistication and realism in their games. Unfortunately, this led to tedious gaming sessions as enjoyable as calculating your taxes.
The rules here are a return to the simple game, with a new way of resolving combat and individual figures rather than groups of men on stands. The "chance" version uses playing cards instead of dice, while the "without-chance" version has automatic combat resolution, and in that sense is more chess-like. The rules work for any number of toy soldiers and are fine for solitaire games.
The setup in the rules is for a generic encounter game with terrain objectives, but any scenario, including victory through routing the opposing force, will work as well. Players may add rules for more realism at their own peril.
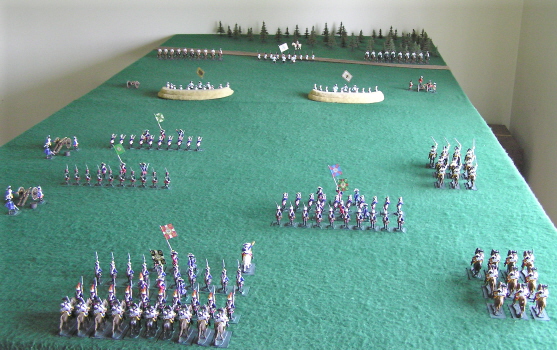
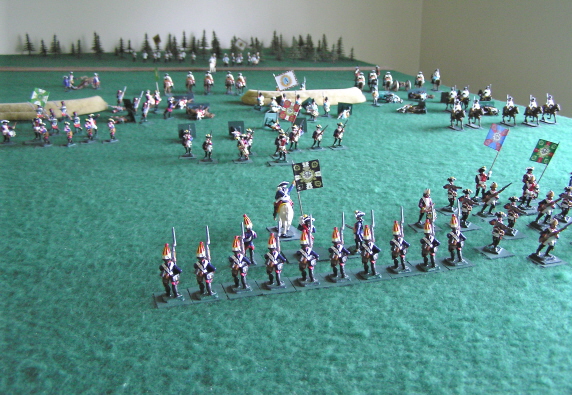
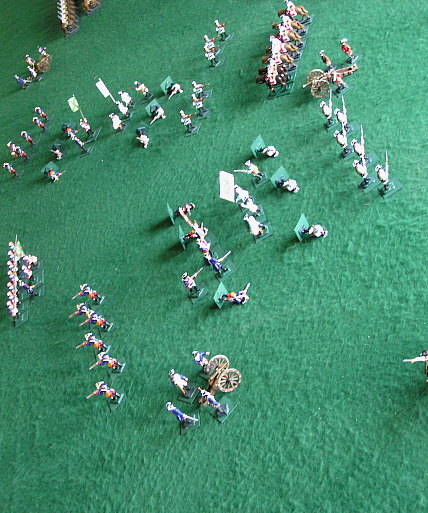
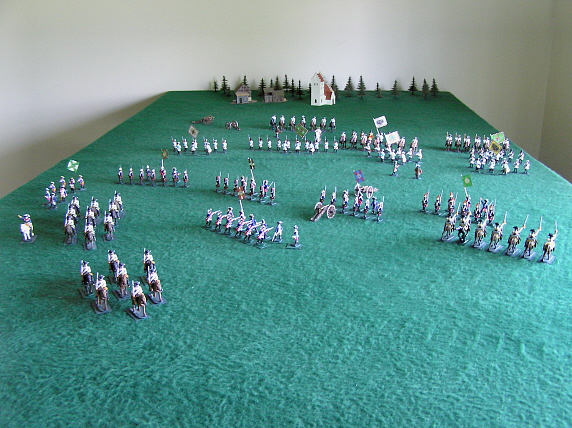
Here is a small battle to illustrate what can happen. After that, you can find the rule sets and three larger sample battle reports.
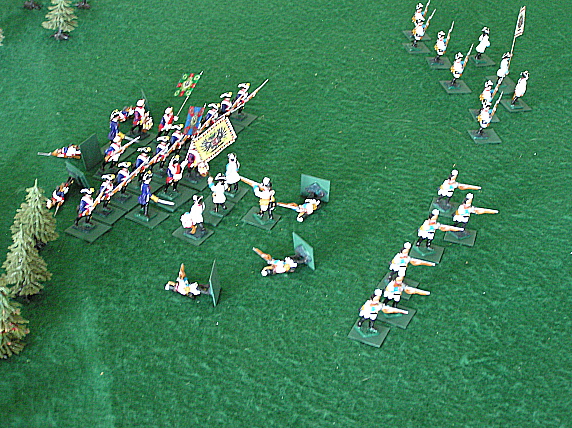
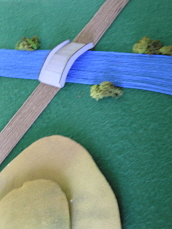
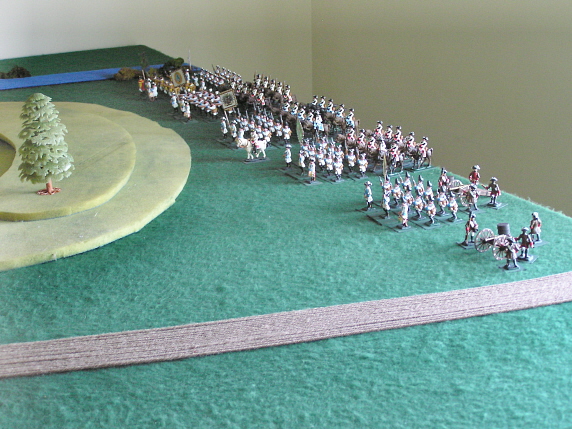
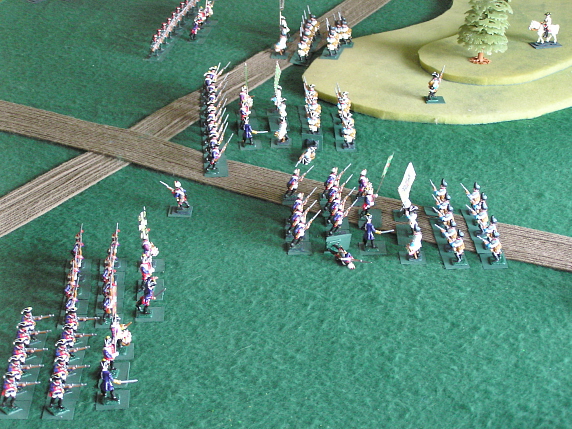
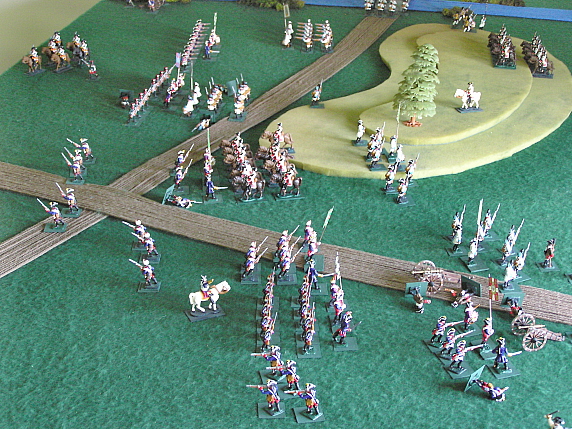
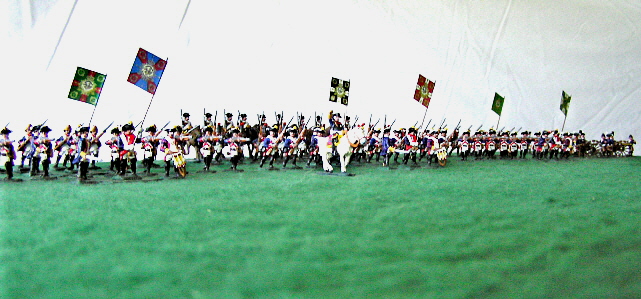
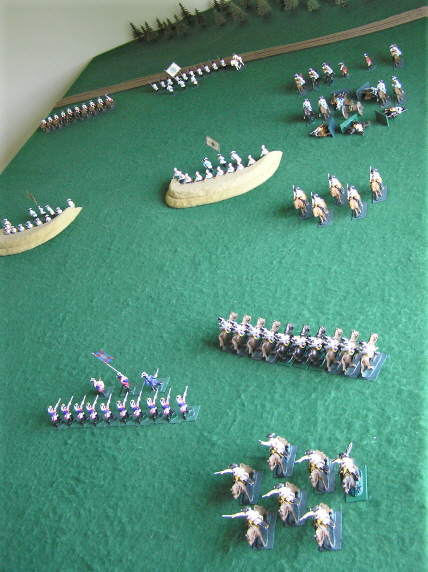
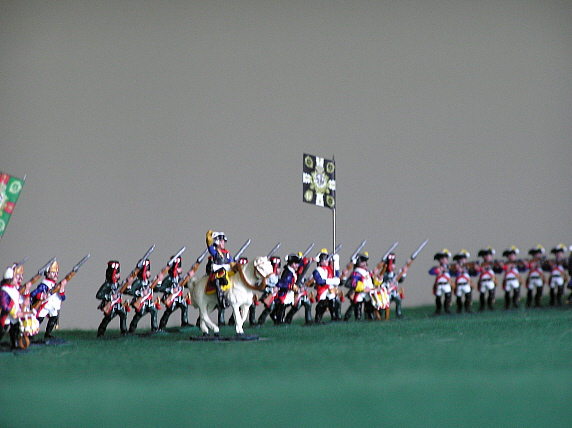
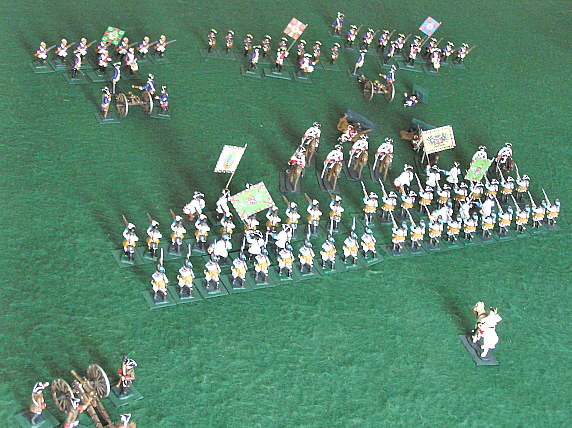
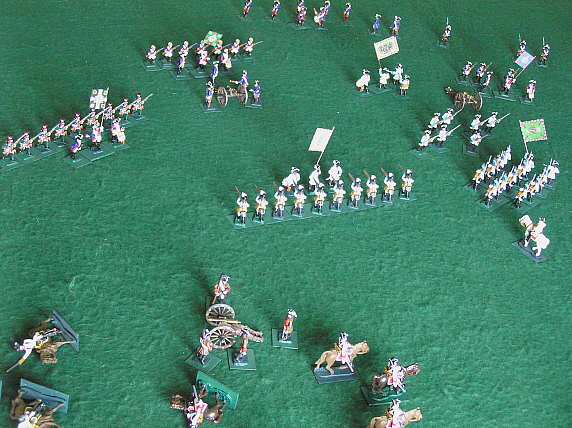
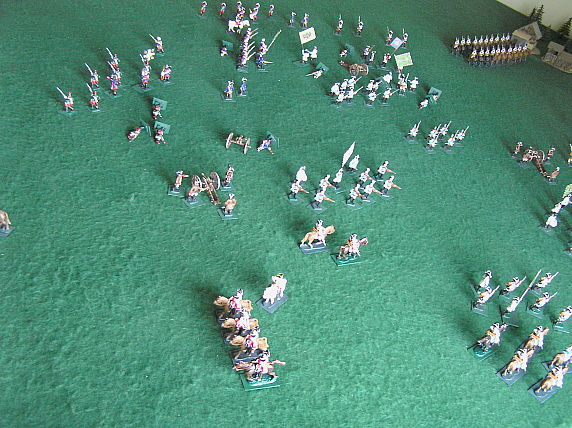
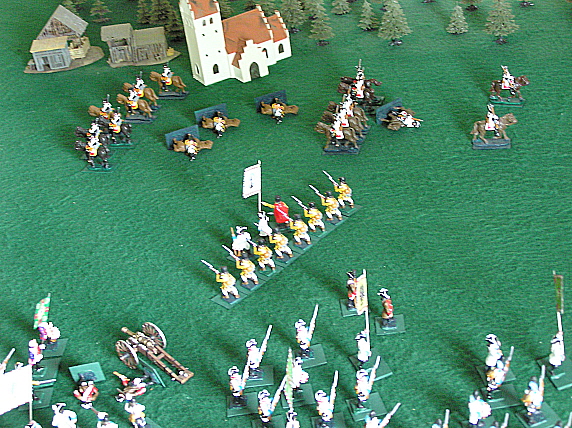
![]()
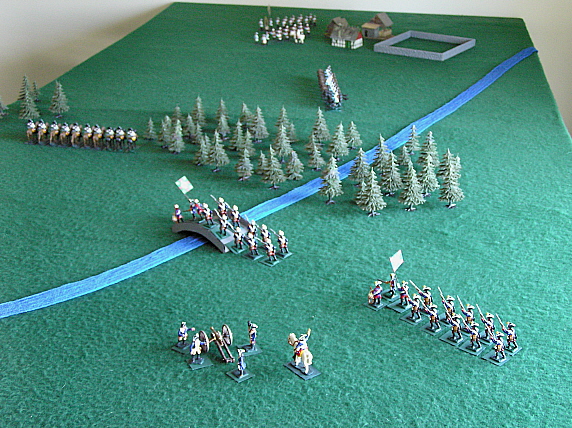
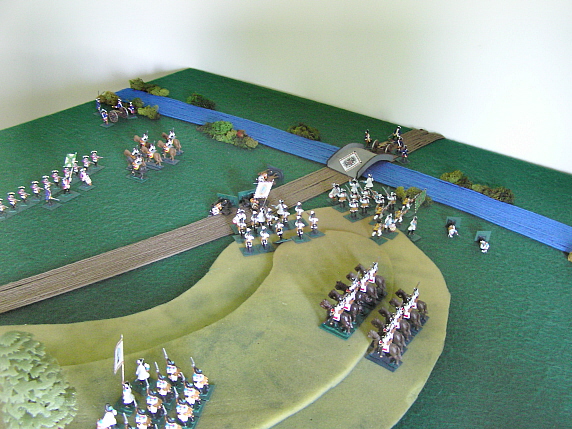
Advance Guard
A
battle with the chance version
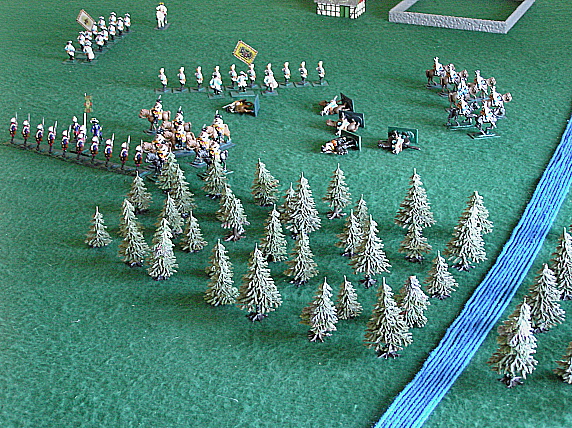
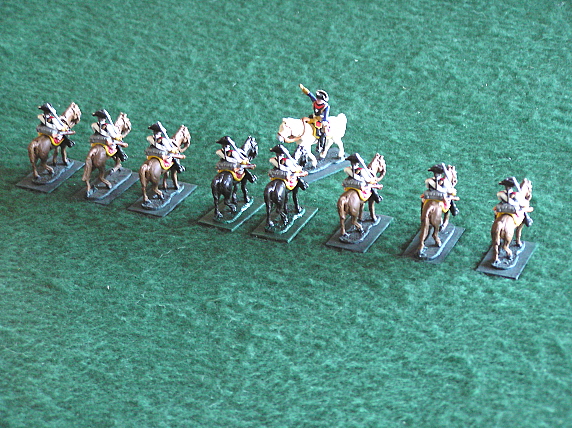
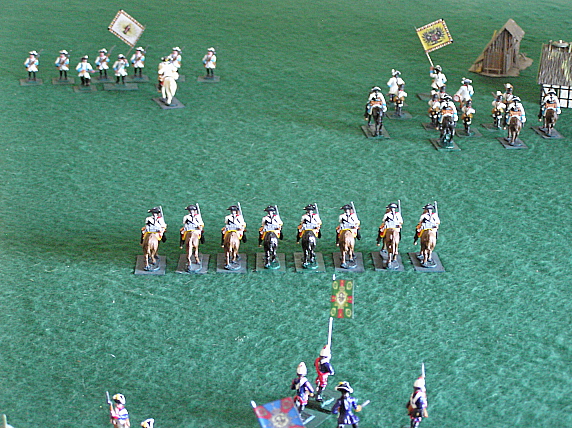
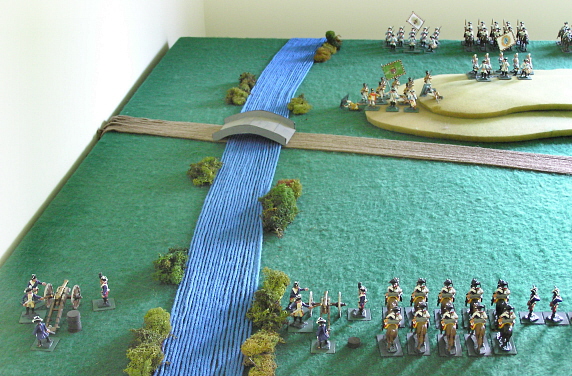
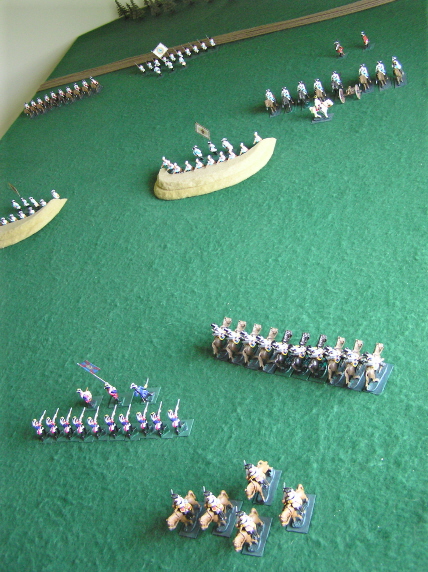
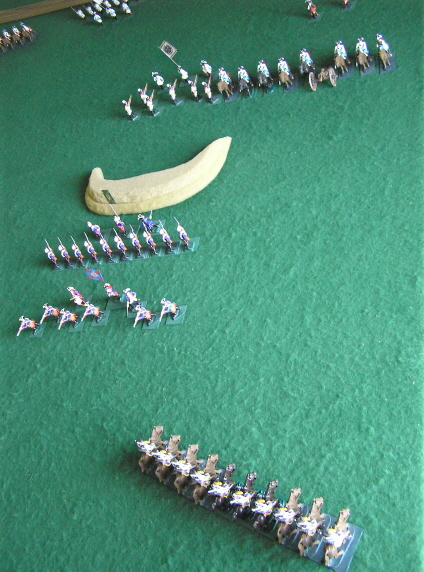
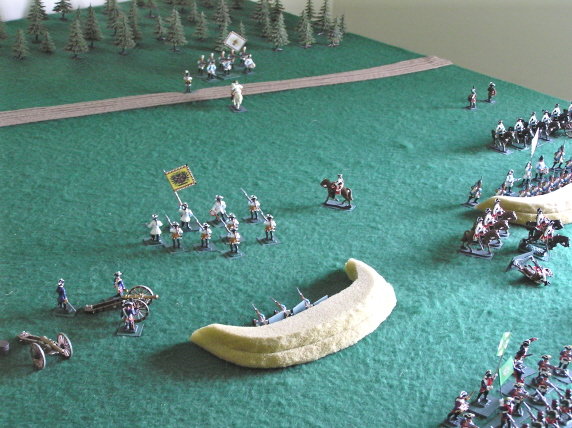
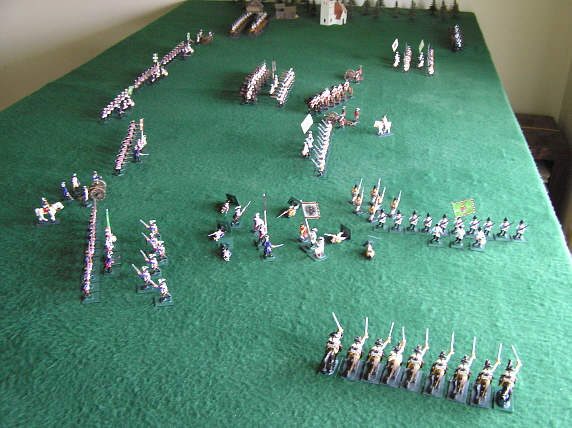
A large Prussian army is on the move. Ahead of it is an advance guard under General Kreytzen. He has two infantry units and one unit each of cavalry and artillery. As they approach a bridge crossing the unfordable river Protz, they see an Austrian cavalry unit in line on the other side.
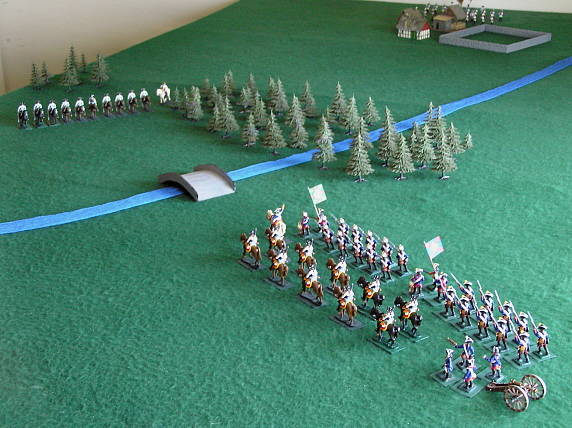
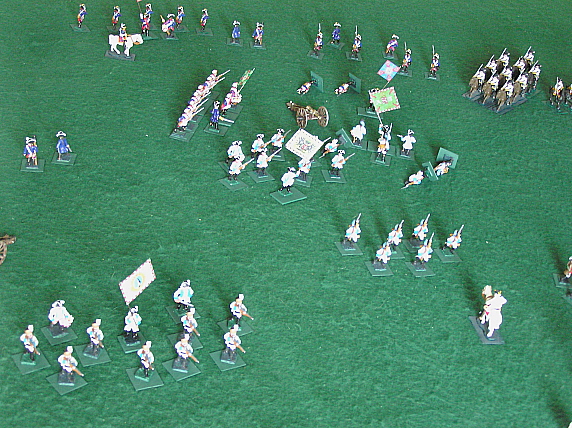
The Austrians have detachments watching a number of the Protz bridges. This detachment is commanded by General Hadik. He is bivouacked with two infantry units near a farm, and comes up to look when he gets a report from the cavalry. Hadik has orders to prevent, or at least delay, any Prussian advance beyond the bridge.
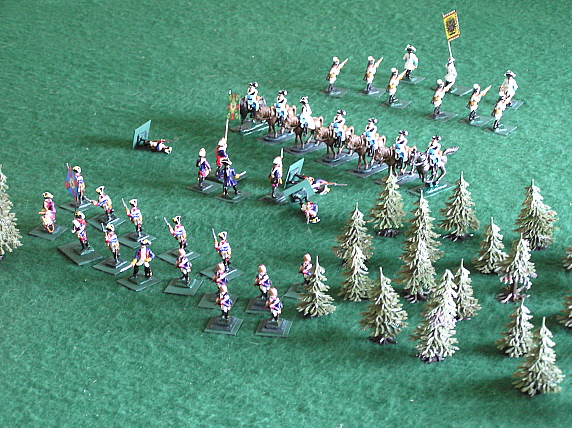
Kreytzen brings up his artillery to threaten the Austrian cavalry. Hadik pulls them back from the line of fire.

Hadik has determined that he can hold a narrow gap in the woods with his small force. He puts his cavalry in position to attack the flank of Prussian units that advance through the gap, and moves his infantry towards the gap in columns.
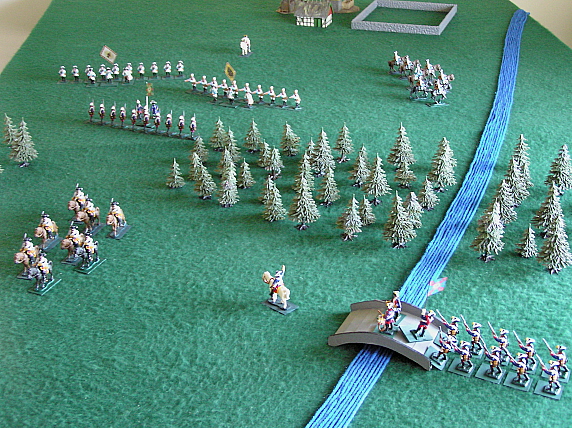
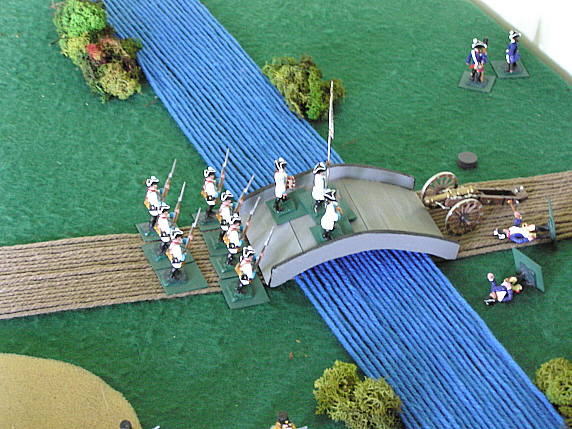
Kreytzen sees the importance of getting past the gap before it is blocked. He sends his cavalry into it, and brings his fusilier infantry unit across the bridge.
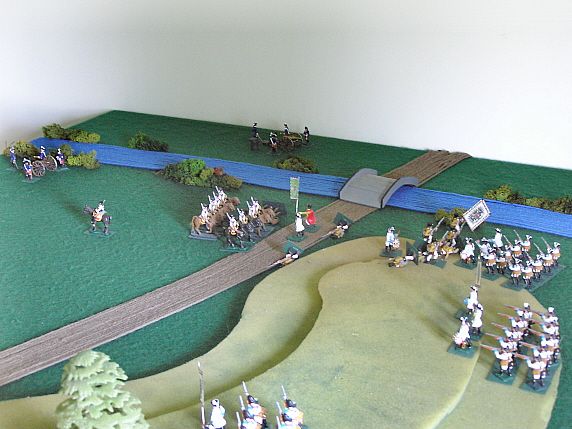
Despite the approaching enemy infantry, Kreytzen boldly charges the Austrian cavalry. He hopes it will buy time to allow his infantry to advance beyond the gap.
The Prussian cavalry are getting the best of the Austrians. Hadik decides he needs to deploy his first infantry unit to deal with the Prussian cavalry should they win.
The Prussian cavalry succeed in routing the Austrian cavalry, but Hadik marches his infantry unit into their flank.
One volley sends the Prussian cavalry running. But Kreytzen was able to deploy his fusiliers beyond the gap.
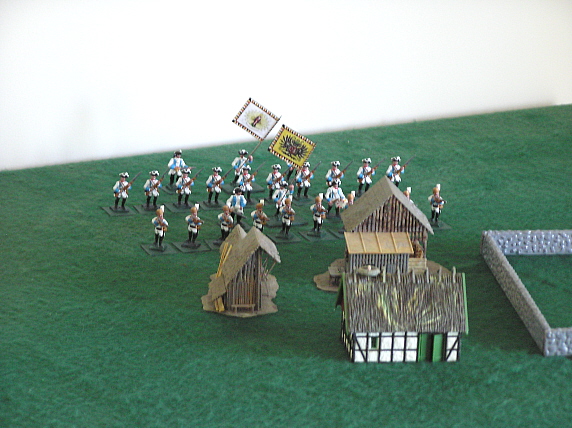
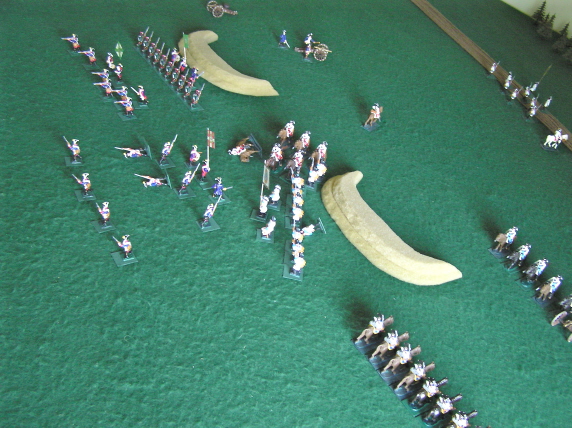
Hadik moves his two infantry units forward to engage the Prussian fusiliers. Kreytzen rushes his second infantry unit across the bridge, concerned it might not get there in time to support the fusiliers.
The Prussians fight well, and begin to get the upper hand on the Austrian infantry.
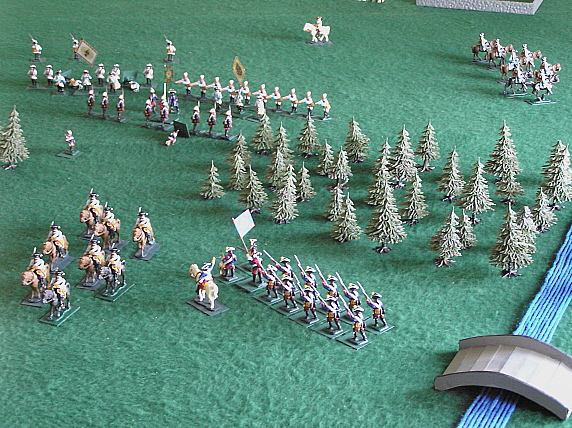
The intrepid fusiliers dispatch the first Austrian infantry unit, and deal blows to the second one. But they are down to only a few men in ranks. Even so, Kreytzen can hardly believe his good fortune. His second infantry unit has arrived, and it has to deal with only one battered Austrian infantry unit. Hadik quickly rallies his cavalry.
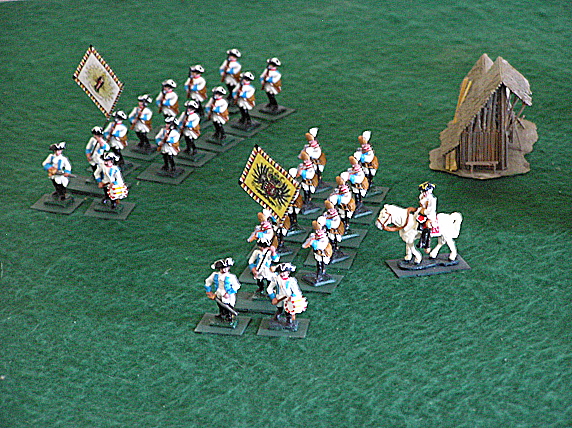
The Prussian infantry charge past the fusiliers, and send the Austrian infantry running.
Hadik sees everything falling apart. As his last hope, he sends his rallied cavalry unit charging into the victorious Prussian infantry unit. The Prussians are caught completely by surprise. The ones who are not cut down run away. Now only the tattered few fusiliers remain to hold the gap.
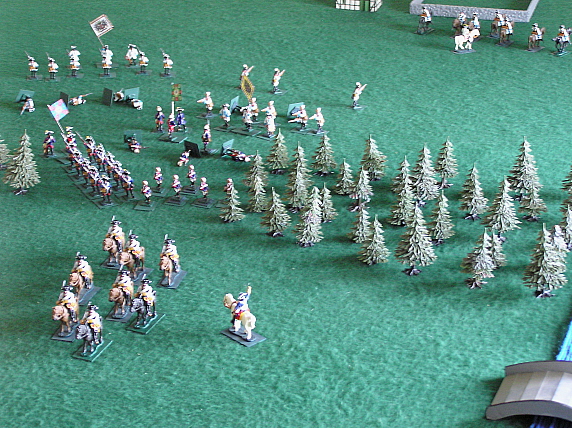
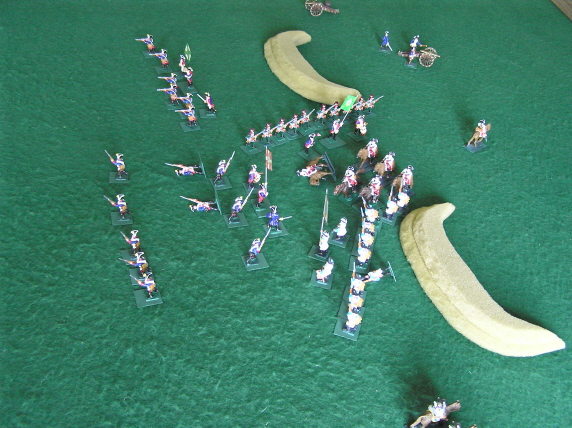
Kreytzen sees victory slipping away. There is no time to bring up the artillery; he rallies his cavalry.
As Kreytzen leads the cavalry towards the gap, he can't believe his eyes. The fusiliers have stood their ground! The last of the Austrian cavalry join their routing infantry. Hadik sees he has lost the battle for the gap, and starts to rally his second infantry unit to cover his withdrawal. He has obeyed his orders to delay the Prussian advance.
The Prussian cavalry chase the Austrians back towards the farm.
Kreytzen happily begins to rally both his infantry units, thinking how he is going to honor the fusiliers for their amazing work in this fight.
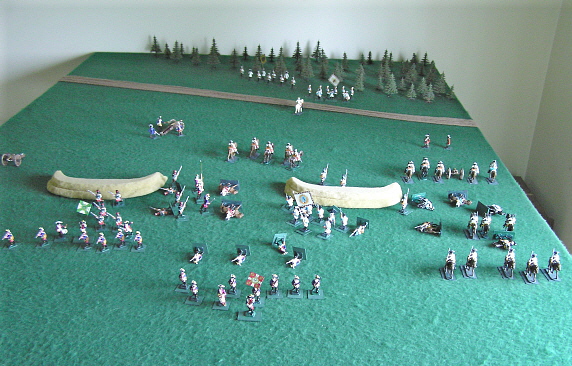
Of the forces engaged, Austrian casualties were 39%; Prussian casualties were 25%. The artillery did not get into action.
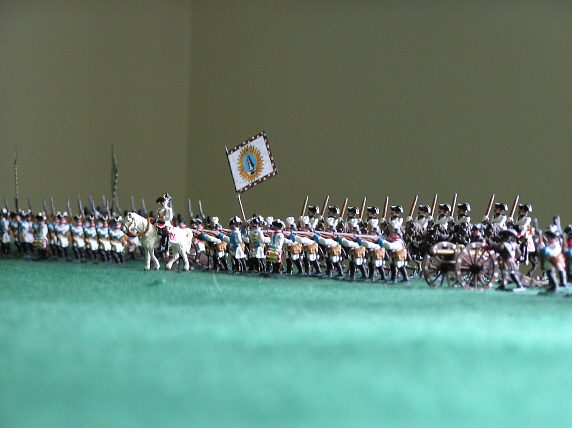
![]()
Blown Away
Chance
version
Simple
rules for musket-era battles with toy soldiers
Setup - encounter scenario
Each side should have a deck of cards, the same number of men and artillery pieces, and one commander. Players place 4 objectives, such as a small hill, walled field, bridge, and village, across an 8 foot long table, near the middle. Optimally, each player writes his setup arrangement of troops on a piece of paper before placing them on the table, so that one player is not reacting to the others setup. Units may have any number of men in them, but may be of only one type (infantry, cavalry, or artillery). However, different types of infantry may be in the same unit (such as pikemen and musketeers). Officers, drummers, and flagbearers are included as members of a unit. Units of 10 cavalrymen, 4 artillerymen, and 13 infantrymen (10 soldiers plus a command element of an officer, drummer, and flagbearer) work well. Once they are assigned to a unit, men must remain part of that unit for the rest of the game. Units may be placed up to 7 inches from the players own rear edge of the table. After setting up, players flip a coin to determine who moves first.
Course of play
Move or rally, and move commander
Fire
long-range artillery
Conduct combats
Turns alternate. Each turn, a player may do one thing. He may move one unit or rally one unit. He may also move his commander any distance. Then he may fire any or all of his long-range artillery, and conduct combats with any or all of his engaged units. A player is never required to move, fire, or conduct combat if he does not choose to.
Moving
Infantry and artillery may move up to 6 inches (exception: artillery prior to 1750 may not move); cavalry may move up to 12 inches. A unit with all its remaining men "in ranks (not running) may pivot on the center man in the front rank any number of degrees (artillery pivot on the cannon axle), then move forward. A column will follow the front men like a snake, while a line will remain rigid. Units may move obliquely forward up to 45 degrees. They must stop when any of their men are less than 4 inches from, and facing or being faced by, enemy troops. Units may pass closer than 1 inch by enemy troops when neither side is facing the other. Units may pass through friendly troops. A unit may change formation and the direction it is facing, but may not move that turn. A unit engaged in combat with an enemy unit may not pivot or move. Nor may units move if they have both men in ranks and men running. Units with no men still in ranks (all remaining are running) may move in any direction as an unorganized mob up to 18 inches, but may not pass closer than 6 inches from enemy troops. If a unit encounters an enemy unit that has all running men, the running unit is moved away 18 inches by the owning player, and the moving unit completes its move. Running units unable to go the entire 18 inches are eliminated.
Rallying
A player may rally a unit if 1) it has at least one man remaining in ranks and none are 6 inches or less from any enemy men in ranks who are facing them, or 2) it has no men in ranks and all of its running men are 24 inches or more from any enemy men in ranks facing any direction. In the first case, the unit may return to ranks as many men who are already in ranks. For example, if a unit of 15 has 3 men in ranks, 3 killed, and 9 running, it may rally 3 of the running men. Next turn it may rally the remaining 6 running men, if the player decides that is the one thing he wants to do with his turn, because it will then have 6 men in ranks. In the second case, the unit may rally 1 man if the commander is next to the unit. Thereafter, rallying proceeds as in the first case (rallying 1, then 2, then 4, etc.) if the player decides that is the one thing he wants to do with each of his turns. Thus rallying a unit with no men in ranks takes longer than a unit with men in ranks. Artillery gunners that have run 6 inches from their cannon return to it when they rally. If they have run farther, after they rally they must be moved back to their cannon, 6 inches per turn, before they can fire it again.
Long-range artillery
After moving or rallying one unit, the moving player may (if he chooses) fire long-range artillery. Each artillery piece gets 4 cannon balls (represented by markers such as black marbles) at the start of the game. It may fire at any enemy unit in a clear line of sight between 4 and 36 inches away and 45 degrees left or right of its boresight. One man is killed in the target unit. He is put in the storage tray, unless the target unit is engaged in combat, in which case the killed man is left where he fell. No men run when a unit is hit by long range artillery. Only one artillery gunner is needed to fire a cannon. When it fires, the artillery piece eliminates 1 cannon ball marker if the target unit is in the open or in soft cover such as woods; if the target unit is behind a solid wall, eliminate 2 cannon ball markers; if the target unit is behind a redoubt or in a trench, eliminate 3 markers. An artillery piece without enough markers may not fire.
Combat
Combat is between all types of opposing units (infantry, cavalry, artillery) that are less than 4 inches apart, with at least one of the opposing units facing the other. The moving player may choose whether or not to conduct a combat with a particular unit of his. He may only conduct combat once per turn with each of his units, but an opposing unit can be engaged by more than one unit. Cavalry may not conduct combat against an enemy unit behind a redoubt, wall, in a trench, or in woods.
To conduct a combat, each player turns up the top card in their deck. An infantry or artillery unit defending behind a redoubt, wall, or in a trench adds 3 to their card. If one card is higher than the other (Ace = 1, Jack = 11, Queen = 12, King = 13), one enemy man is killed. The winning player gets to choose which one of the enemy men to kill and which one(s) will run. Normally, one man runs 6 inches to the rear (and faces to the rear) for each man killed in the fight thus far. So with the first man killed, one man runs; when the second man in the unit is killed, two men run; when the third man is killed, three men run; etc. To keep track, leave killed men on the field until the engagement is over. While engaged in combat with an enemy unit, men killed by long-range artillery are included in the count. When an artillery unit is in combat, the cannon never runs; the gunners do.
If both cards are equal in value, both sides "win" the combat. Each side loses a man killed, and the number who run is based on the number of men already killed in each unit; these are selected by the opposing, not owning, player.
A unit's command element, consisting of a flag bearer, commanding officer, and other special figures such as drummers, may not be killed or made to run until they are the only ones left in ranks. Of these, the flag bearer must be the last to go.
Special combat situations
When artillery wins a combat, one enemy man is killed and the number of men who run is equal to the number on the winning card, so up to 10 men may be caused to run (Jack, Queen, and King each cause 4 men to run). Always use the face value of the card for the number of men who run, even when defending behind a redoubt, wall, or in a trench.
A win by cavalry causes 1 more man to run than would normally.
A unit with any pikemen or guardsmen left in it after taking a casualty has 1 less man run than would normally.
A militia unit has 2 more men run than would normally after taking a casualty.
A win by a unit attacking the flank or rear of an enemy unit causes 4 more enemy men to run than would normally.
End of engagement
An engagement usually lasts more than one turn. While it continues, each side may involve additional units. An engagement is over when one or both players have no men in ranks remaining in that particular fight. Return all killed men to the storage tray. Note that as men are killed or run, remaining men in ranks may be more than 4 inches from the enemy they are engaged with. Regardless, the units remain engaged until it is over.
Re-engaging before rallying is complete
A unit may have finished an engagement, leaving it with both men in ranks and men running, and its dead removed to the storage tray. If the unit is engaged in combat by an enemy unit before the unit has rallied all of its running men, calculations for the new fight proceed normally: with the first man killed, one man runs; when the second man in the unit is killed, two men run; when the third man is killed, three men run; etc. (taking into account special types like pikemen, guardsmen, and cavalry). The unit will of course have less depth because it began the fight with less men in ranks; some were already running.
Winning an encounter scenario
As soon as men in ranks of one side completely occupy, or were the last to occupy, three of the four objectives, that player wins. Having been the last ones to pass through an objective counts as being the last to occupy; a garrison does not need to hold an objective.
![]()
Blown Away
Without-chance
version
Simple
rules for musket-era battles with toy soldiers
Setup - encounter scenario
Each side should have the same number of men and artillery pieces, and one commander. Players place 4 objectives, such as a small hill, walled field, bridge, and village, across an 8 foot long table, near the middle. Optimally, each player writes his setup arrangement of troops on a piece of paper before placing them on the table, so that one player is not reacting to the others setup. Units may have any number of men in them, but may be of only one type (infantry, cavalry, or artillery). However, different types of infantry may be in the same unit (such as pikemen and musketeers). Officers, drummers, and flagbearers are included as members of a unit. Units of 10 cavalrymen, 4 artillerymen, and 13 infantrymen (10 soldiers plus a command element of an officer, drummer, and flagbearer) work well. Once they are assigned to a unit, men must remain part of that unit for the rest of the game. Units may be placed up to 7 inches from the players own rear edge of the table. After setting up, players flip a coin to determine who moves first.
Course of play
Move or rally, and move commander
Fire
long-range artillery
Conduct combats
Turns alternate. Each turn, a player may do one thing. He may move one unit or rally one unit. He may also move his commander any distance. Then he may fire any or all of his long-range artillery. And finally, both players conduct combats with any or all of their engaged units. A player is never required to move, fire, or conduct combat if he does not choose to.
Moving
Infantry and artillery may move up to 6 inches (exception: artillery prior to 1750 may not move); cavalry may move up to 12 inches. A unit with all its remaining men "in ranks (not running) may pivot on the center man in the front rank any number of degrees (artillery pivot on the cannon axle), then move forward. A column will follow the front men like a snake, while a line will remain rigid. Units may move obliquely forward up to 45 degrees. They must stop when any of their men are less than 4 inches from, and facing or being faced by, enemy troops. Units may pass closer than 1 inch by enemy troops when neither side is facing the other. Units may pass through friendly troops. A unit may change formation and the direction it is facing, but may not move that turn. A unit engaged in combat with an enemy unit may not pivot or move. Nor may units move if they have both men in ranks and men running. Units with no men still in ranks (all remaining are running) may move in any direction as an unorganized mob up to 18 inches, but may not pass closer than 6 inches from enemy troops. If a unit encounters an enemy unit that has all running men, the running unit is moved away 18 inches by the owning player, and the moving unit completes its move. Running units unable to go the entire 18 inches are eliminated.
Rallying
A player may rally a unit if 1) it has at least one man remaining in ranks and none are 6 inches or less from any enemy men in ranks who are facing them, or 2) it has no men in ranks and all of its running men are 24 inches or more from any enemy men in ranks facing any direction. In both cases, if the commander is next to the unit the unit may rally up to 6 men. Artillery gunners that have run 6 inches from their cannon return to it when they rally. If they have run farther, after they rally they must be moved back to their cannon, 6 inches per turn, before they can fire it again.
Long-range artillery
After moving or rallying one unit, the moving player may (if he chooses) fire long-range artillery. Each artillery piece gets 4 cannon balls (represented by markers such as black marbles) at the start of the game. It may fire at any enemy unit in a clear line of sight between 4 and 36 inches away and 45 degrees left or right of its boresight. One man is killed in the target unit. He is put in the storage tray, unless the target unit is engaged in combat, in which case the killed man is left where he fell. No men run when a unit is hit by long range artillery. Only one artillery gunner is needed to fire a cannon. When it fires, the artillery piece eliminates 1 cannon ball marker if the target unit is in the open or in soft cover such as woods; if the target unit is behind a solid wall, eliminate 2 cannon ball markers; if the target unit is behind a redoubt or in a trench, eliminate 3 markers. An artillery piece without enough markers may not fire.
Combat
In every combat phase both players conduct combats, and all combats are considered to be simultaneous. Combat is between all types of opposing units (infantry, cavalry, artillery) that are less than 4 inches apart, and units may only conduct combat if an enemy unit is in front of them. Each player may choose whether or not to conduct combat with a particular unit of his. Each unit that conducts combat kills one enemy soldier and causes a certain number to run. The player causing the casualties gets to choose which one of the enemy men to kill and which one(s) will run. An infantry unit's command element, consisting of a flagbearer, officer, and drummer, may not be killed or made to run until they are the only ones left in ranks. Of these, the flag bearer must be the last to go. Each unit may only conduct combat once per turn, but a unit can be engaged by more than one enemy unit. Cavalry may not conduct combat against an enemy unit behind a redoubt, wall, in a trench, or in woods.
Infantry: One enemy man is killed. Normally, one man runs 6 inches to the rear (and faces to the rear) for each man killed in the fight thus far. So with the first man killed, one man runs; when the second man in the unit is killed, two men run; when the third man is killed, three men run; etc. To keep track, leave killed men on the field until the engagement is over. While engaged in combat with an enemy unit, men killed by long-range artillery are included in the count.
- A unit with any pikemen or guardsmen left in it after taking a casualty has 1 less man run than would normally.
- A unit behind a redoubt, wall, or in a trench has 2 less men run than would normally.
- A militia unit has 2 more men run than would normally after taking a casualty.
- A unit attacking the flank or rear of an enemy unit causes 4 more enemy men to run than would normally.
Artillery: One enemy man is killed and 6 men run 6 inches to the rear (and face to the rear).
- When the target unit is behind a redoubt or in a trench, one enemy man is killed and 2 men run 6 inches to the rear (and face to the rear).
- Artillery firing on the flank of an enemy unit kills 2 men and causes 10 to run 6 inches to the rear (and face to the rear).
Cavalry: One enemy man is killed, and the number of enemy men who run to the rear (and face to the rear) is equal to the number of cavalrymen in the unit conducting the combat when the combat began. So if a unit with 10 cavalrymen in ranks conducts a combat, one enemy man is killed and 10 run.
- A unit attacking the flank or rear of an enemy unit causes 4 more enemy men to run than would normally.
After combat, if any men in ranks remain in an engaged enemy unit that is facing the cavalry, all remaining cavalrymen in ranks run 6 inches. This is cavalry's weakness. So if a 10-man cavalry unit fights a 13-man infantry unit, each side loses 1 man killed; 1 cavalryman runs and 10 infantrymen run. Since 2 infantrymen remain in ranks, the other 8 cavalrymen run too. This also applies when a cavalry unit is engaged with (within 4 inches of) more than one enemy unit that is facing the cavalry. Even though the cavalry fought only one of the enemy units, men in ranks in the other unit(s) that remain after combat cause the cavalrymen to run.
End of engagement
An engagement usually lasts more than one turn. While it continues, each side may involve additional units. An engagement is over when one or both players have no men in ranks remaining in that particular fight. Return all killed men to the storage tray. Note that as men are killed or run, remaining men in ranks may be more than 4 inches from the enemy they are engaged with. Regardless, the units remain engaged until it is over.
Re-engaging before rallying is complete
A unit may have finished an engagement, leaving it with both men in ranks and men running, and its dead removed to the storage tray. If the unit is engaged in combat by an enemy unit before the unit has rallied all of its running men, calculations for the new fight proceed normally. The unit will of course have less depth because it began the fight with less men in ranks; some were already running.
Winning an encounter scenario
As soon as men in ranks of one side completely occupy, or were the last to occupy, three of the four objectives, that player wins. Having been the last ones to pass through an objective counts as being the last to occupy; a garrison does not need to hold an objective.
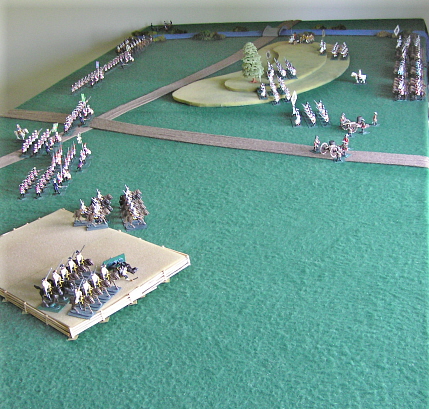
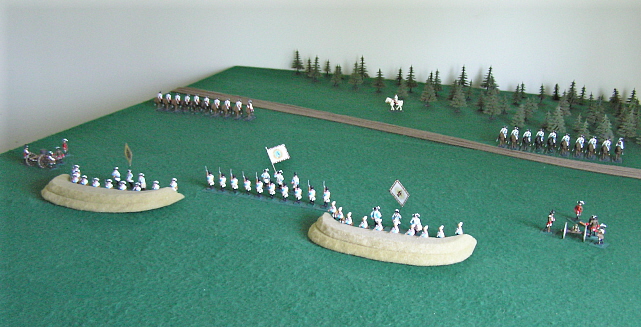
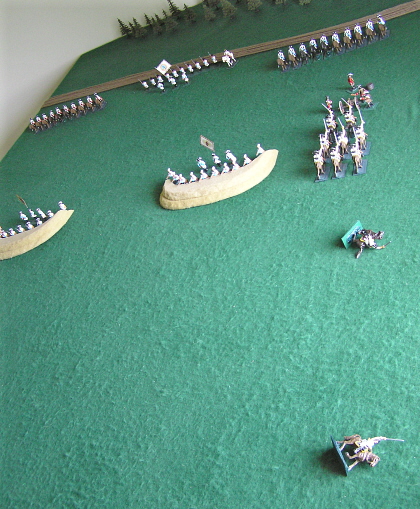
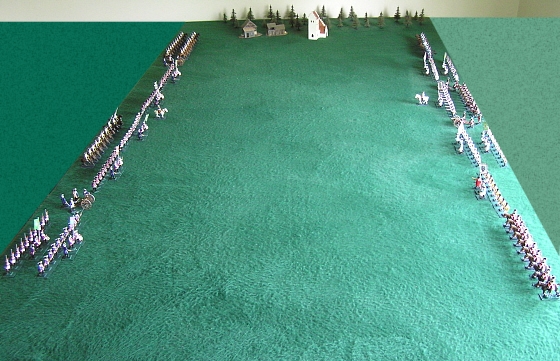
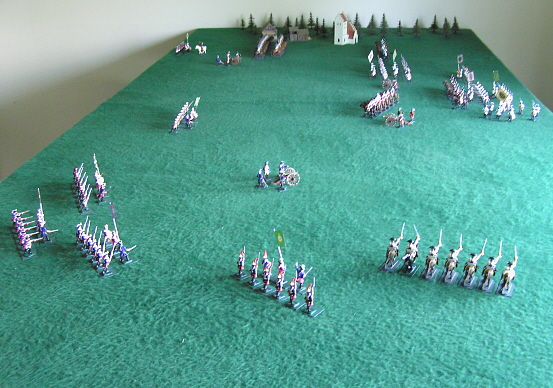
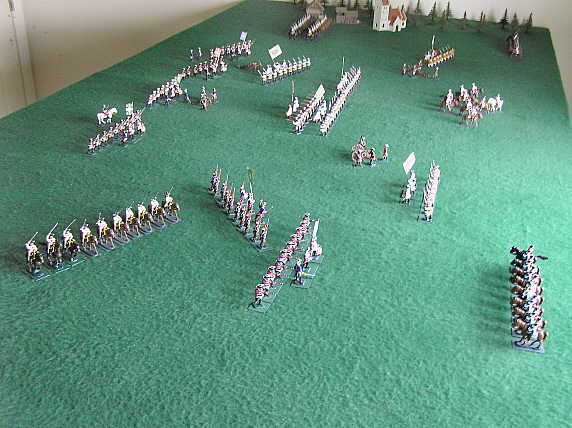
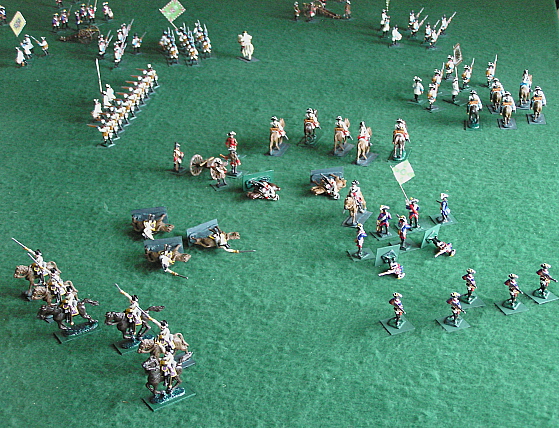
![]()
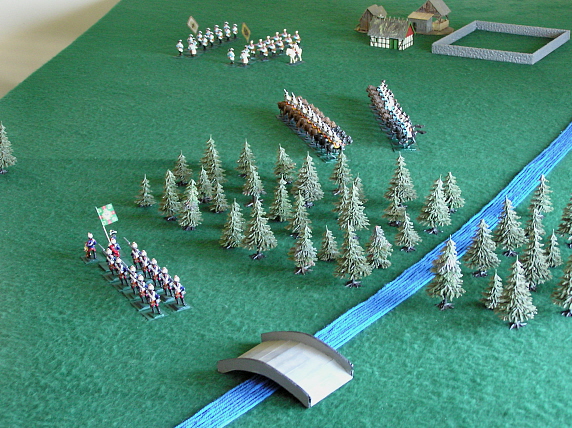
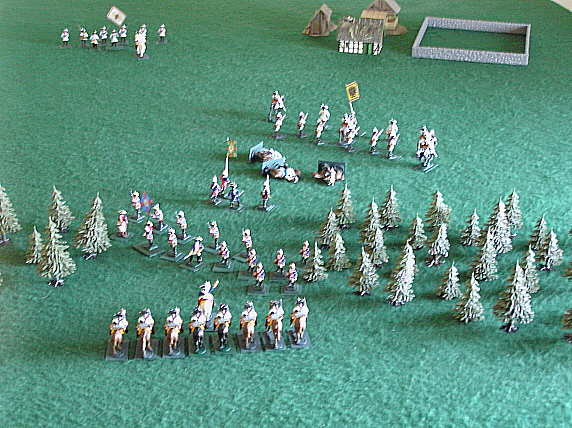
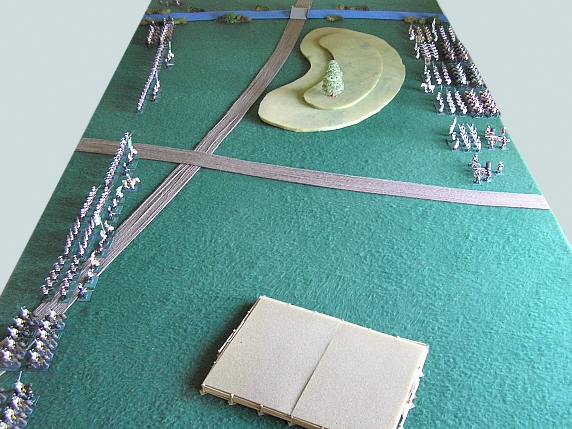
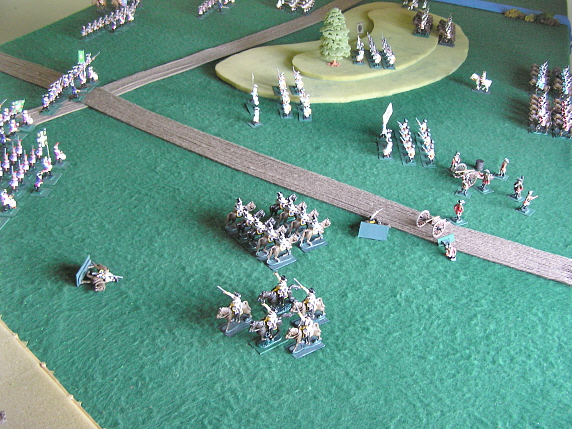
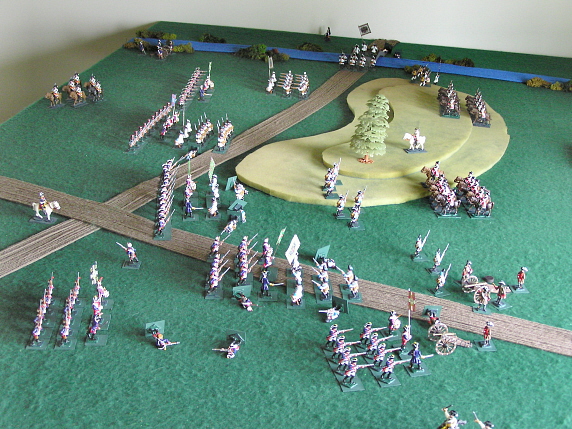
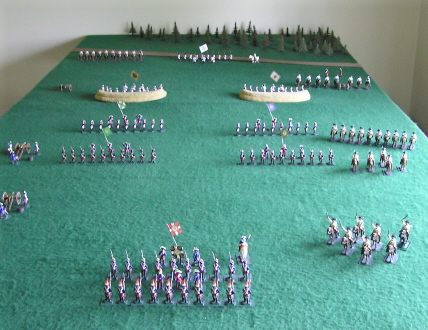
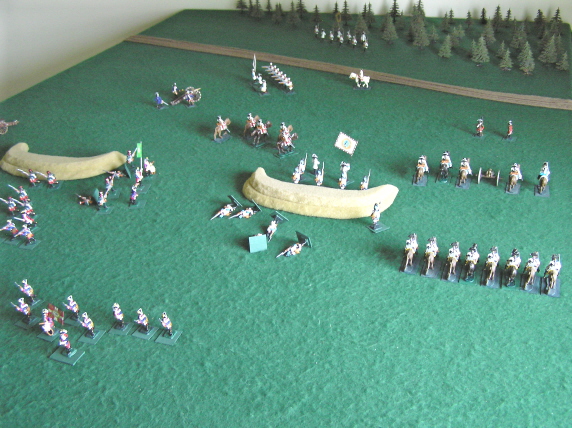
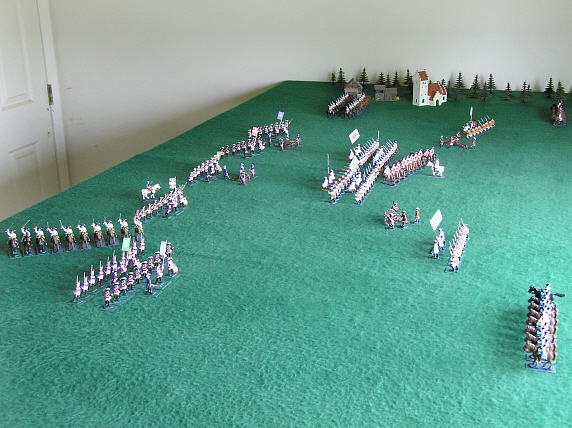
Crossroads
An
encounter battle with the chance version
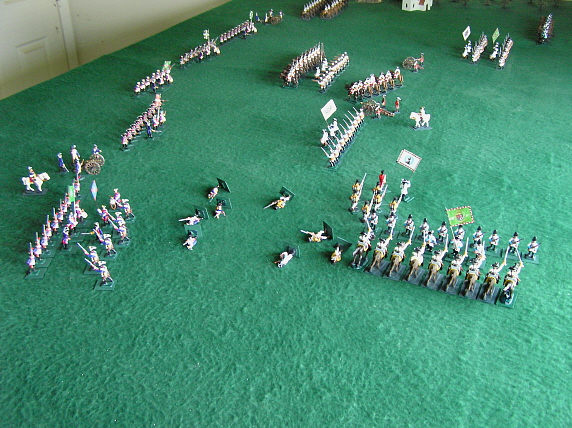
Four objectives have been placed on the battlefield: a long hill, a bridge, a wheatfield, and a road intersection or crossroads. Victory is achieved by occupying, uncontested, three of them.

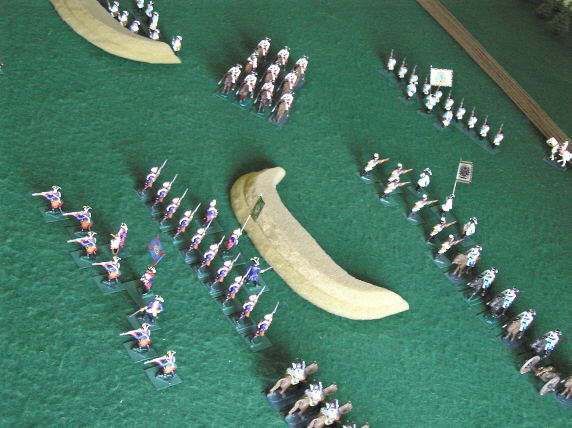
Each objective is somewhat off-center, but overall neither long side has an advantage. The forces are equal. Players write their deployments in secret, then place their troops. Prussian general Finck has deployed so as to quickly take the crossroads and wheatfield. Austrian general von Pach is in position to overwhelm the hill and bridge.
Finck has placed artillery on both sides of the river to make it costly for the Austrians to capture the bridge. The bulk of his force is arrayed far beyond the Austrian flank. With the cavalry on the outside, he plans to hold the crossroads, sweep across the wheatfield and envelop the hill. If he can force the Austrians back against the river, they will have nowhere to rally routing units.
Von Pach realizes that he must move fast; a protracted fight would find his force boxed in. But three objectives are within reach. He plans to rush the hill, and from there expand to take the bridge and crossroads. He hopes his artillery can delay a Prussian flank attack.
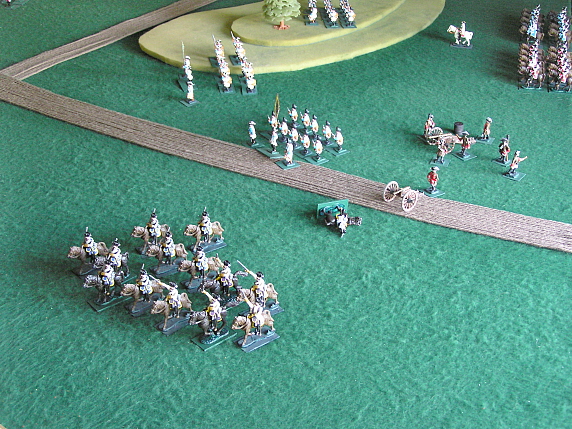
The Prussians begin their sweep from the crossroads to the wheatfield. The Austrian left flank pushes forward to meet them, and Austrian infantry marches onto the hill.
Prussian long-range artillery fire begins picking off Austrian Pandours advancing towards the bridge.
Finck cannot resist charging the isolated and depleted Pandours with his left flank cavalry. If he can beat them and recover quickly, he could take the bridge and win the game.

The Pandours do not put up much of a fight, and von Pach sees the danger. He sends another infantry unit towards the bridge. In response, Finck moves the artillery on the far side of the river towards the bridge.
The Pandours run, but before they can rally the Prussian cavalry are charged by Austrian infantry coming over the hill. The cavalry rout. Prussian artillery and Austrian infantry have both reached the bridge and are contesting it.
In the fight for the bridge, the Prussian gunners are swept away. Von Pach leaves more than enough units nearby to discourage the Prussians from any further attempts on the bridge.

Finck is disappointed over the lost opportunity, but still feels confident in his plan.
On Finck's right flank, the first Prussian cavalry unit, depleted by long-range Austrian artillery fire, fails to dislodge the Austrian battery. However, the second cavalry unit is poised to strike.
The steely Austrian gunners repulse the second charge too! Finck had hoped to put the Austrian flank into chaos and then assault the hill, but the flank has held. Now it is up to the Prussian infantry.
Von Pach takes the initiative. He sends his infantry forward to check the Prussians near the crossroads. The Prussians are out of cavalry, whereas von Pach has all three of his cavalry units available. He intends to hurl them at the crossroads.
Finck sees he must break the Austrian infantry quickly, and in fact his men are getting the upper hand.
Just as the Prussians win the infantry contest at the crossroads, Austrian cavalry rides into the melee. The Prussian fusiliers and grenadiers rout the Austrian infantry before them.
The way is open for the Prussians to flank the cavalry and advance on the hill. Von Pach pushes his second artillery unit forward to engage the fusiliers and grenadiers.
The Prussian infantry mow down the Austrian gunners, but the fight is on at the crossroads.
The Prussian infantry at the crossroads are collapsing before the Austrian cavalry. Finck orders his grenadiers to swing left across the road and charge the cavalry. Von Pach launches his second cavalry unit forward to block the grenadiers.

The last of the Prussian infantry defending the crossroads fall. "It is appropriate that they lost their colors", Finck grumbles to himself. "They did not take down even one of the Austrian riders." The Prussians have no reserves left, and the second Austrian cavalry unit has thundered onto the scene to stop the advance of the Prussian grenadiers.
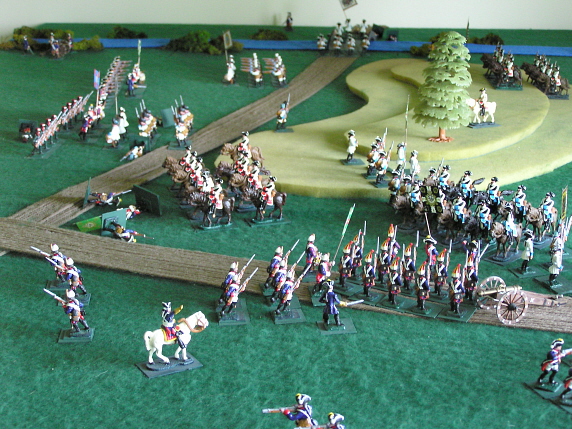
The first Austrian cavalry unit takes the crossroads uncontested, giving von Pach his third objective and the win. The loss of Prussian cavalry units in failed attempts to exploit early opportunities left Finck unable to adequately defend against a concentrated blow. Casualties on both sides were 20 percent.
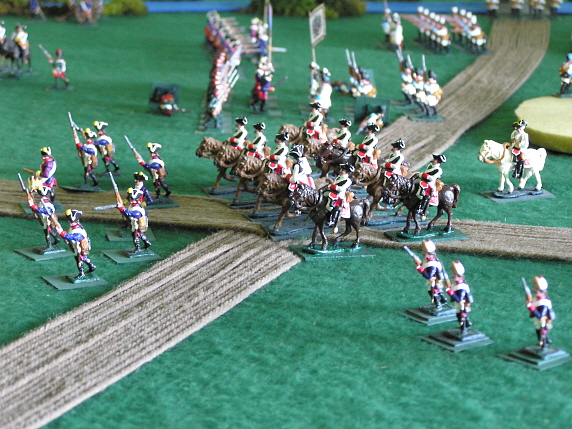
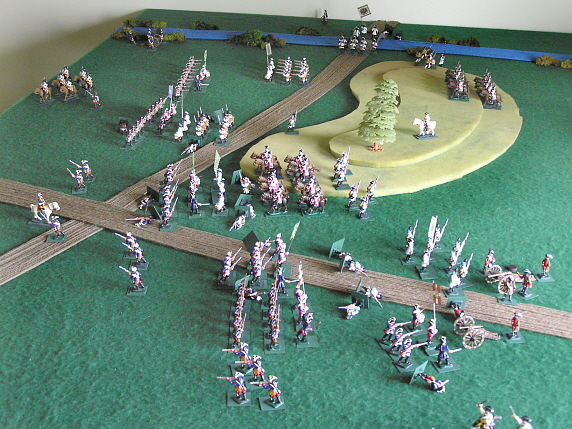
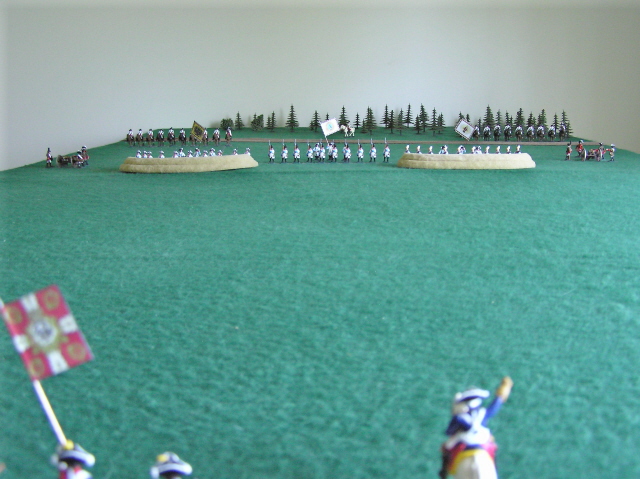
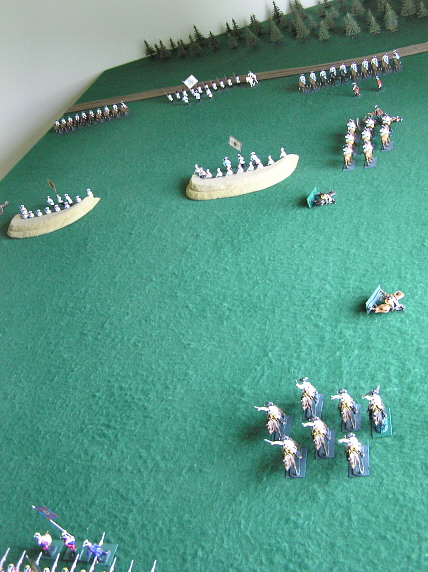
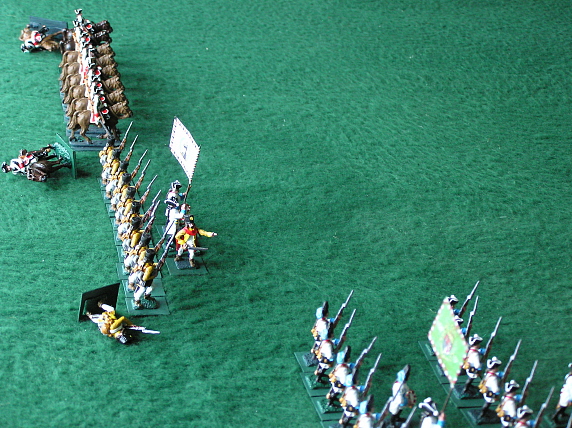
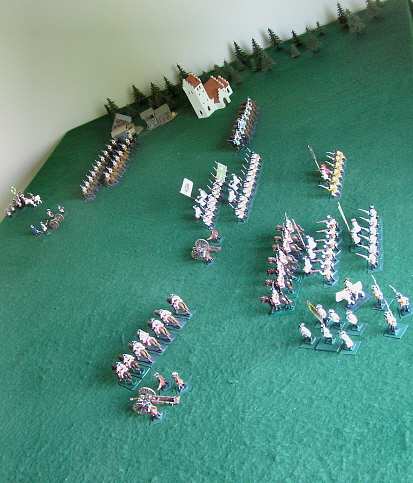
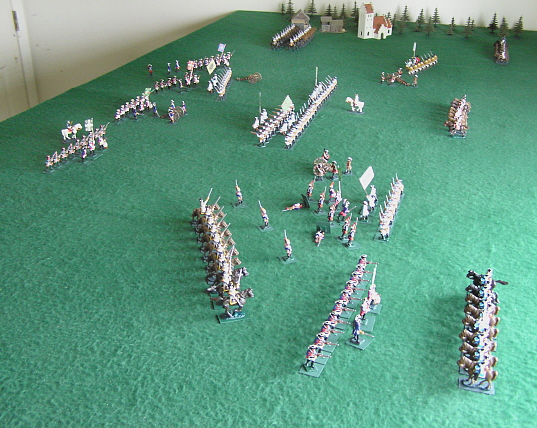
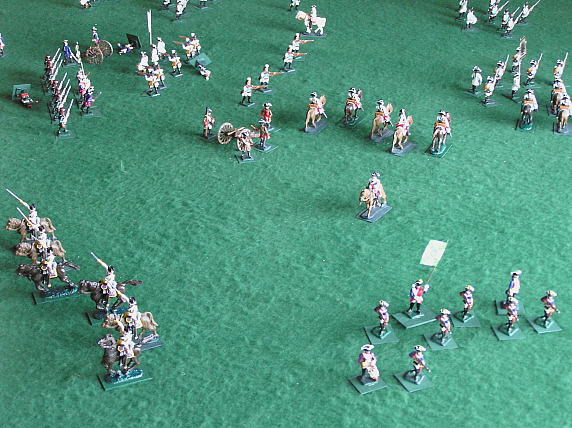
![]()
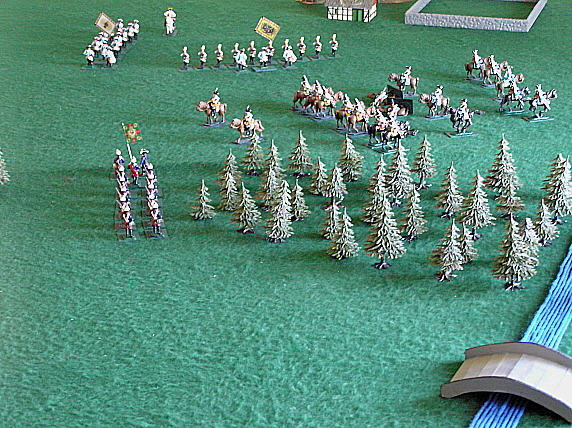
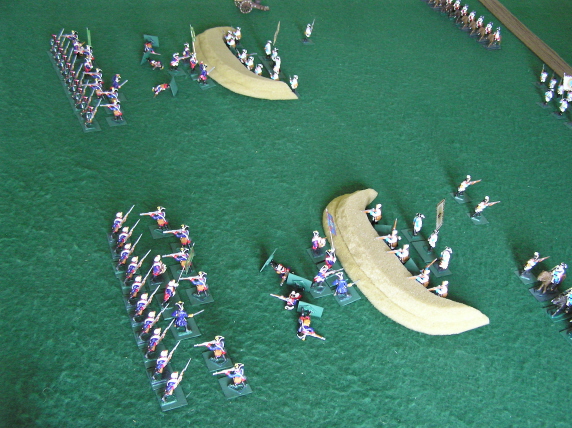
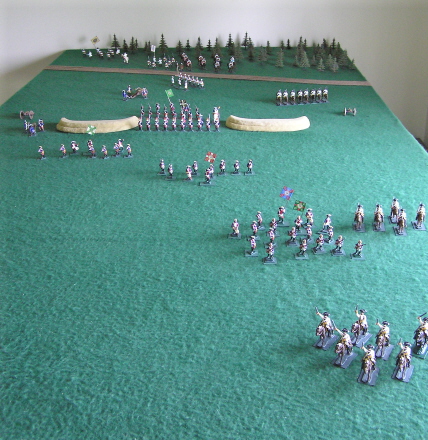
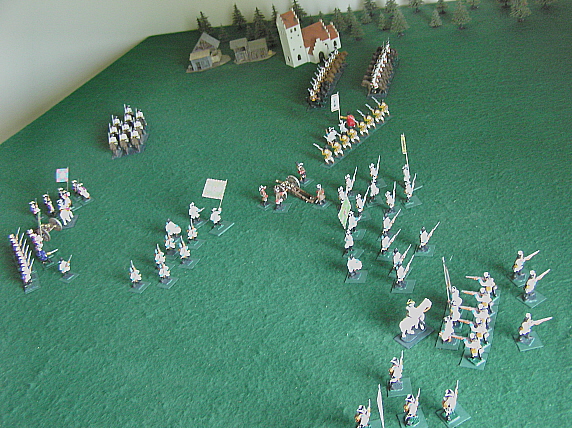
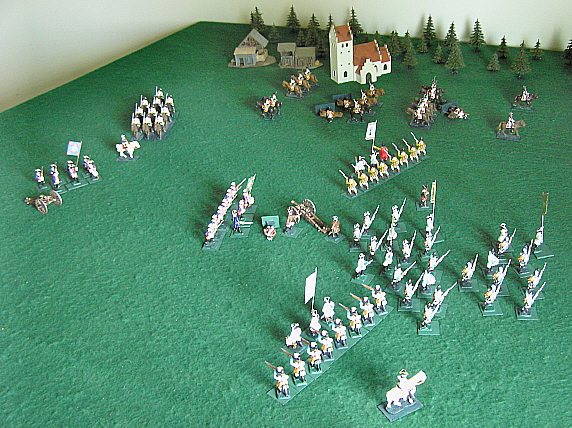
Fieldworks
A
battle with the chance version
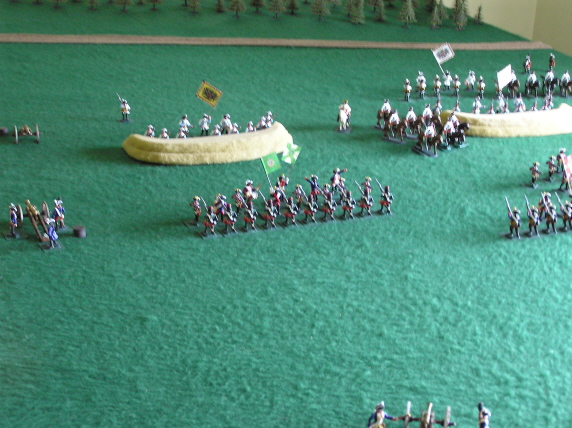
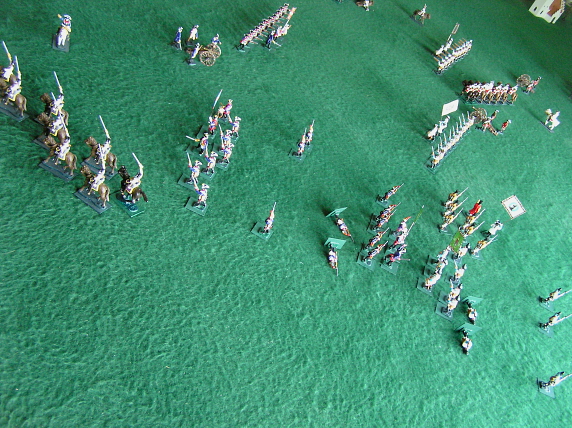
After a day of indecisive battle between large armies, the Prussian commander decides to attack a strong point in the Austrian line the next day. Two redoubts protect a lateral communication road where it passes near the front line. Cutting this road will divide the Austrian force and make it easier to defeat. The Prussian commander has placed most of his reserves under General Tresckow. They are to assemble before dawn, attack at first light, and cut the road before the defenders can be reinforced.
As the early morning mist rises from the field, Tresckow leads forward a force of 6 infantry and 3 cavalry units plus 2 cannon.
Ahead of them are the redoubts, earthen fieldworks for the protection of defending infantry or cannon. There are 3 infantry and 2 cavalry units plus 2 cannon under General Beck.
Beck quickly realizes he is heavily outnumbered, and dispatches a courier for reinforcements. Tresckow halts his force just outside artillery range.
Tresckow pushes his two cannon forward to engage the western Austrian gun. They knock it out with minimal Prussian casualties. Beck pulls his exposed grenadier unit back from the center out of artillery range.
On his left, Tresckow advances 2 infantry units and a cannon. On his right, he launches 2 cavalry units in column towards the eastern Austrian cannon, and 2 infantry units begin a slow march towards the east redoubt.
The first Prussian cavalry unit charges the cannon, losing 2 riders to long-range fire.
They are easily repulsed by the Austrian gunners. Undeterred, the second Prussian cavalry unit charges forward.

The second cavalry unit also loses 2 riders to long-range artillery fire, but manages to get in among the Austrian gunners to cut them down.
In response, Beck throws his left cavalry unit at the Prussians.
After a spirited skirmish, the Prussian cavalry is routed. Tresckow sends his third cavalry unit to his right to cover the advancing infantry.
Beck rallies his cavalry. They hold the line, but the artillerymen cannot rally to the gun because an in-ranks enemy unit is too close. Both Austrian cannon are out of action.
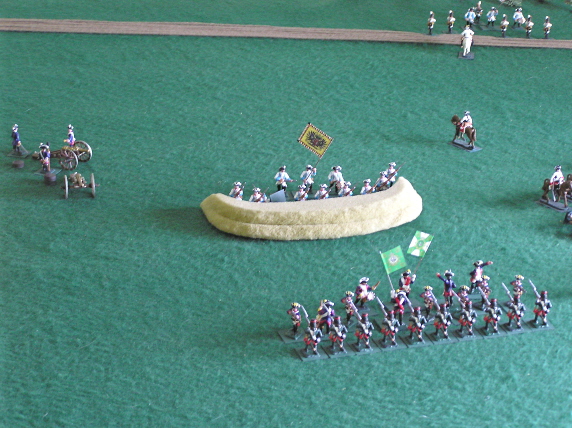
Without pausing to rally his cavalry, Tresckow marches 4 infantry units towards the redoubts. Beck can only watch and wait, hoping the Prussians shatter themselves on the fieldworks.
And that is what happens to the first Prussian unit at the west redoubt. But despite the odds, at the east redoubt the Prussians give as good as they take.
In the end it is a draw; the east redoubt has been cleared, and the Prussians prepare to occupy it. Tresckow moves his cavalry unit up to prevent the Austrian cavalry from engaging the fusiliers, and orders one of his 2 reserve infantry units forward.
Beck launches both his reserve units at the east redoubt to prevent its capture.
The Austrian cavalry plow into the fusiliers, and begin to get the upper hand. The Austrian grenadiers approach the redoubt.

The Prussian fusiliers fight hard but are defeated. The Austrian grenadiers re-occupy the east redoubt as the reserve Prussian infantry unit arrives on the scene.

Beck rallies his victorious cavalry unit on the spot. But Tresckow sees that the Austrians have committed their last reserves; the west flank is open. He pushes his lead cannon through the opening. The Austrian infantry in the west redoubt dare not maneuver to meet the threat; the Prussian Frei-Corps Kleist infantry would hit their flank. The Prussian reserve infantry unit engages the Austrian cavalry unit, assisted by long-range fire from the rear Prussian cannon.
Once behind the redoubt, the Prussian cannon unload two long-range shots into the Austrians, then move in to cannister range.
One close shot in the rear sends the Austrian infantry in the redoubt running. Tresckow moves the Kleist infantry forward. With the loss of the west redoubt, the Prussians will be able to roll up the Austrian line.
Beck gets a message that reinforcements are on the way; he just needs to hold out for a while longer. He sends his grenadiers over the top of the redoubt into the reserve Prussian infantry, already engaged with the Austrian cavalry. The Prussian infantry begins to falter. Beck orders the cavalry on his left to charge the Prussian cavalry. Beck is all in.
The Kleist infantry turn away from the west redoubt and into the flank of the Austrian cavalry. The battle now hangs in the balance with a confused melee.
The Austrian grenadiers succeed in routing the Prussian reserve infantry. However, both Austrian cavalry units are routed. Beck wants to rally the infantry from the west redoubt, but the Prussian cannon advances to prevent this. So he orders his rallied infantry, who earlier held the east redoubt, to attack the artillery.
Tresckow leads his last intact reserve unit forward, the grenadiers.
To everyone's surprise, the Kleist Frei-Corps infantry defeat the embattled Austrian grenadiers. Nothing remains of the Austrian line. Tresckow rallies his successful cavalry unit.
Routing Prussian infantry and cavalry units are all over the field. Yet the Prussians held such an advantage in numbers that enough remained to break the Austrians. Tresckow rallies the Kleist infantry, and pushes the cavalry and grenadiers forward in pursuit of the Austrians.
Beck abandons the attack on the Prussian cannon, and leads his fleeing forces to the west. He looks forward to having a few words with the commander of the reinforcements.
Both sides lost a similar total number of men. However, there were fewer Austrians on the field, so their casualties were 43% while Prussian casualties were 26%.
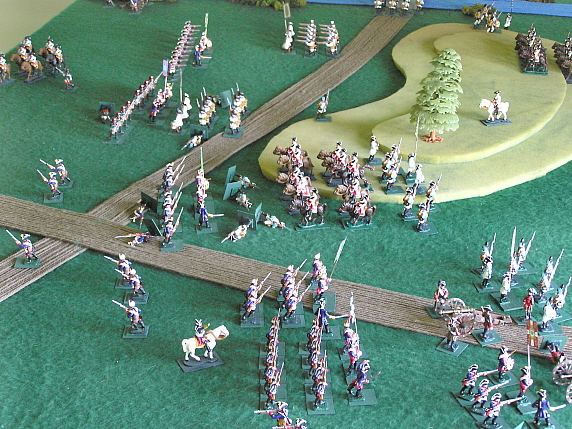
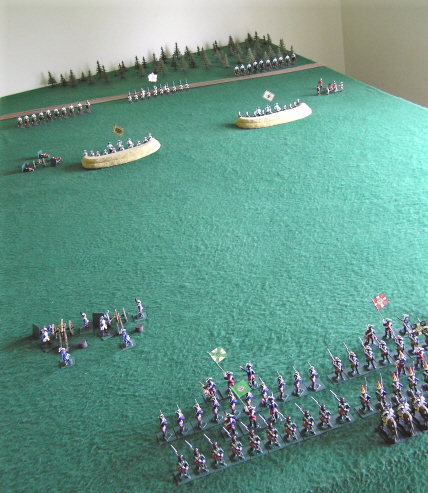
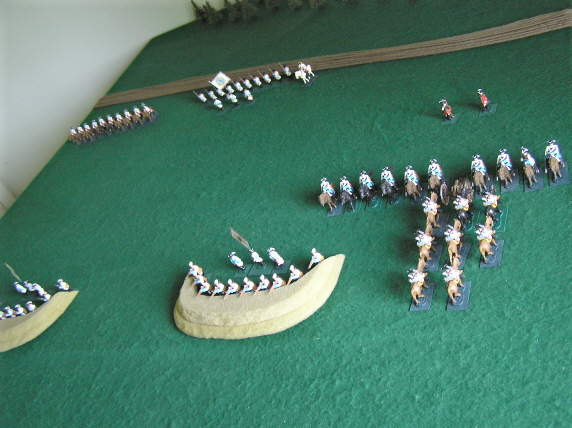
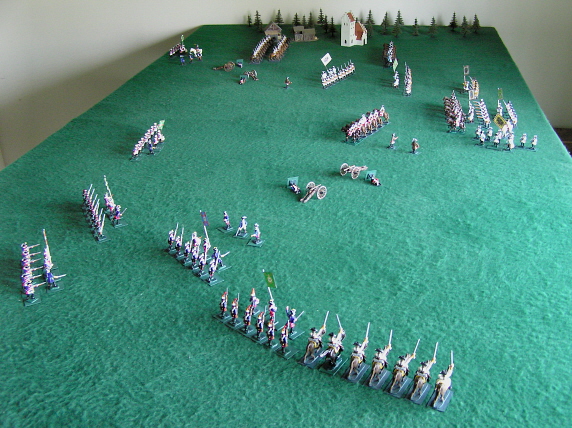
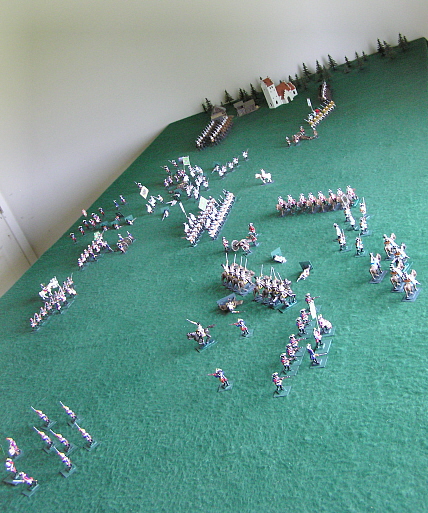
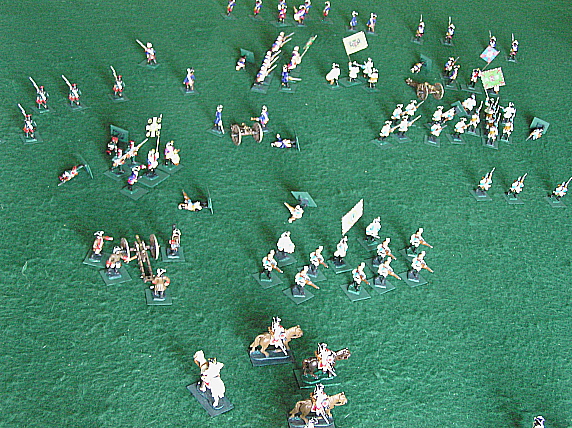
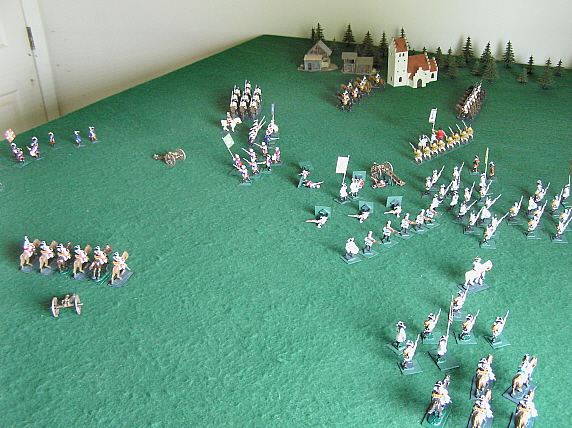
![]()
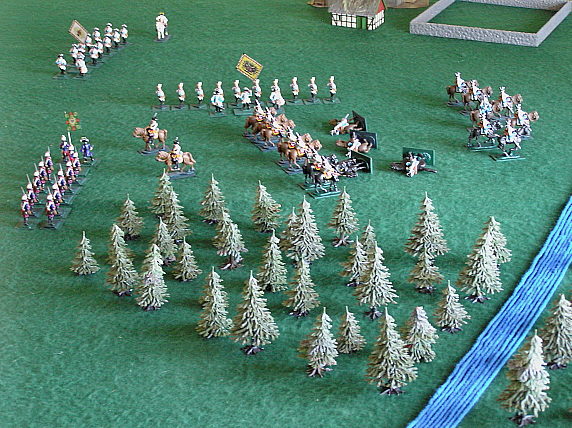
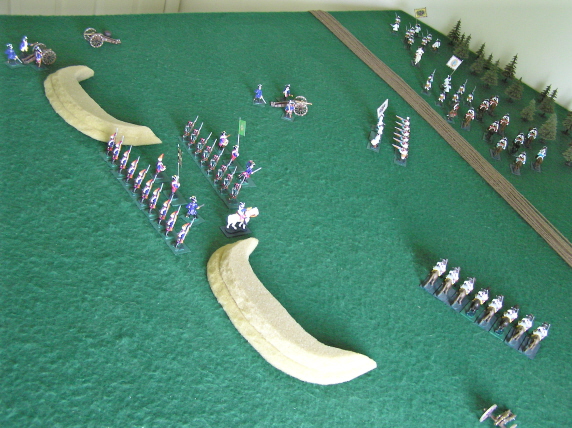
A battle using the without-chance version
7
Years War
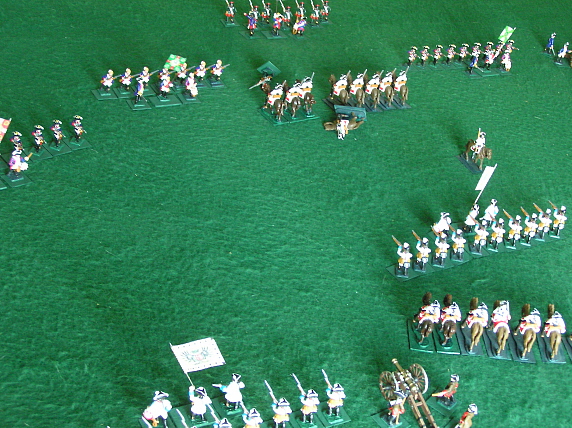
In this battle, Prussian and Austrian armies of the Seven Years War face off on an open field to illustrate the Blown Away rules, without-chance version. The forces are composed of equal numbers and types of troops. The figures are Hinchliffe 25mm.
7
Years War
The Prussian commander, Ziethen, has chosen to reinforce his flanks. The Austrian commander, Lascy, strengthened his center.
As the armies begin moving, they exchange long range artillery fire. The commanders want to weaken enemy units they intend to attack.
Ziethen directs some of his artillery fire against Austrian artillery, a choice he later regrets as wasted shots.

Ziethen drives his right wing forward, while Lascy advances his center. The Prussians strike first. They have the advantage of numbers on the flank, and soon units on both sides are melting away under fire.
A little overanxious to clear the flank, Ziethen attacks a fresh Austrian infantry unit with cavalry, hoping to follow up with infantry that is still a ways back.
But Lascy decides to rally the unit quickly, before the arrival of the Prussian infantry, and so is able to disrupt two Prussian units with it. The Austrian flank forces are gone, but Ziethen has to rally his forces before he can resume the attack.
The pause allows Lascy to attack the center. Weakened by artillery fire, the few Prussian infantry units are disrupted by cavalry and infantry attacks.
At this point, both sides have many disrupted units. Before continuing, the commanders decide to pull their routing units back far enough to rally them before resuming the fight.
Ziethen looks at the situation, and sees that he controls most of the field and still has a small force on the other flank. He intends to drive the rallied units of his right wing as a hammer against the anvil holding his left wing. Lascy is concentrated in the center. He sees an opportunity to crush the isolated Prussian left wing units and then turn on the Prussian right.
Both sides begin the second phase of the battle by pushing forward their own artillery to neutralize defending enemy guns. Then both sides advance.
Ziethen has so many units to move a long way that overall progress is slow. This gives Lascy time to attack. All the Prussian left wing units are disrupted before any Prussian right wing units make contact. Lascy has succeeded.

Without room to fall back, Ziethen must bring the routing units across the field before they can rally. Lascy is able to rally his disrupted units in place, and then begins a general advance against the Prussian right wing.
Ziethen sees that the Austrians have more cavalry and infantry units in hand, including the only remaining fresh infantry unit. So Ziethen withdraws, leaving a cannon and the field to Lascy. Casualties on both sides were 31%.
![]()
A battle with the chance version
This battle will again pit Prussian and Austrian armies of the Seven Years War against each other on an open field, this time to illustrate the Blown Away rules, chance version. To reduce clutter, playing cards that are used to resolve engagements are kept off the table. Each side has the same number and types of troops. The figures are Hinchliffe 25mm. Battle plans are the same as before: the Prussian commander, Ziethen, has reinforced his flanks, while the Austrian commander, Lascy, has strengthened his center, and each will attack where they are strong.

As the commanders advance their units, they exchange long range artillery fire to weaken enemy units they intend to attack.
Ziethen sees that his center will not hold against the Austrian concentration. So he postpones his flank attack in order to hurry both his cannon to the center.
Lascy attacks the right cannon with cavalry. They do some damage, but are repulsed.
Lascy recovers his cavalry and sends in an infantry unit. It overruns the cannon and attacks the infantry. Meanwhile, Ziethen has resumed his advance on the right flank.
The Prussian grenadiers are repulsed by the Austrian infantry, but Ziethen's cavalry follows up and scatters the Austrians. The Prussian infantry rout the Austrian cavalry unit, leaving Ziethen in control of the right flank. He stops to rally his victorious units. To buy some time for his main assault, Lascy sends the rallied cavalry unit toward his open left flank. He regrets having to reduce his center forces.
In the center, the Austrian infantry routs the Prussian unit after a hard fight. Lascy engages another Prussian unit with his second center-right infantry unit. This unit fights well, but in the end is repulsed. Lascy has committed himself to an attack on the center, so he puts a center-left infantry unit in column formation and directs it to attack the weakened Prussian unit.
On his right flank, Ziethen attacks the newly arrived Austrian cavalry unit with his rallied cavalry. They cause casualties, but the Prussians are repulsed. So Ziethen attacks the few remaining Austrian cavalrymen with his rallied infantry unit.
The Austrian cavalry fight amazingly well. In fact, they repulse the infantry!
Although only one lone Austrian cavalryman remains in ranks, all the right-flank Prussian units are routed. As they say, "in the land of the blind, a one-eyed man is king". Lascy can rally the cavalry unit, but the routed Prussian units must begin a turn 24 inches away from an enemy unit in ranks before they can start to rally. That is often the deciding factor that determines which armies win or lose battles with these rules.
In the center, Ziethen moves up an infantry unit and artillery against the remaining Austrian center-left infantry unit. The artillery sends the Austrians running.
Lascy pushes his cannon forward to engage the battered Prussian infantry unit; the Prussians are routed. Ziethen rallies the artillerymen who have just performed so admirably, and pushes his cannon towards the Austrian gun to engage it. The Austrian gun prevails. Lascy begins to rally his remarkable left-flank cavalry unit.
Once they are rallied, he sends the cavalry to the middle of the field on the left flank, leaving the Prussians no place to rally their routed units on that flank.

Seeing that his main effort on the right flank has failed miserably, Ziethen attempts to crush the last vestige of the Austrian assault on the center by putting a left-flank cavalry unit in column and moving it and a center infantry unit against the remaining Austrian infantry there. It is clear that Ziethen's bolstering of his center with artillery early on made a big difference.
The Austrian infantry is routed. Surprisingly, the main efforts by both commanders have failed. The Austrians control their left flank, and the Prussians control the center! But the Austrians have units in positions that prevent Prussian units from rallying. Ziethen's hope for victory now rests on defeating the Austrians on his left flank. He had weakened the enemy cavalry and infantry there early in the battle with long-range artillery fire. The Prussians attack the Austrian cavalry as Lascy hurries to rally an infantry unit.
The cavalry attack begins to falter. Ziethen throws an infantry unit against the Austrian artillery, but the rallied Austrian infantry unit is coming on.
The Prussian cavalry routs, and Ziethen's hopes fade. His infantry has overrun the artillery, but now the Austrian infantry unit is engaged.
The Prussian infantry fight hard, but the larger Austrian infantry unit prevails. It is over.
Lascy has four units in hand and more in position to be rallied. Ziethen has only two organized units left and cannot rally others, so he withdraws his men. Lascy is left with the field and Ziethen's cannon, but his forces are too mauled to mount a pursuit. Casualties on both sides were 35%.
John Michael Fischer
Blown
Away rules and webpage 2006
- 2021
mike@newgeology.us